A bathroom tile that clicks, shifts, or sounds hollow when tapped is more than a cosmetic annoyance. If you repair loose bathroom tiles before water reaches the wall or subfloor, you may prevent a small repair from becoming damaged drywall, a soft floor, or hidden mold. The right fix depends on where the tile is located, how much movement there is, and whether moisture caused the bond to fail.
Why Bathroom Tiles Come Loose
Tile is durable, but the materials behind it can move, weaken, or hold moisture. In bathrooms, loose tile is often a symptom rather than the whole problem.
On a shower wall, failed grout or caulk can allow water behind the tile. Over time, the setting material may lose its grip, and drywall or backer board can deteriorate. A loose floor tile may point to an uneven subfloor, a gap in the original mortar coverage, or movement in the floor beneath it. In older homes, normal settling can contribute as well.
A single loose tile surrounded by firm, intact tile is usually a manageable repair. Several loose tiles in one area, cracked grout lines that keep returning, soft drywall, staining, or a musty odor deserve a closer inspection. Reattaching tile over a failing surface can hide the problem for a while without solving it.
Check the Tile Before You Repair It
Start by pressing gently near the corners and center of the tile. Do not force it. If it rocks or clicks, the tile has likely released from the adhesive beneath it. Lightly tap it with the handle of a screwdriver or another non-metal tool. A hollow sound can indicate a void behind the tile, though it does not always mean the tile is ready to come off.
Look closely at the grout and caulk around the area. Crumbled grout, gaps where the wall meets a tub or shower pan, and cracked caulk are common routes for water intrusion. On a floor, check whether nearby tiles are also loose or whether the floor feels springy underfoot.
The location matters. A loose tile on a dry bathroom wall may be mostly cosmetic. A loose tile inside a shower, around a tub, or on a bathroom floor near a toilet requires more caution because water can travel behind the finished surface. If the surrounding wall feels soft or the tile comes off with damp, crumbling material attached, stop the repair and have the substrate evaluated.
How to Repair Loose Bathroom Tiles That Are Intact
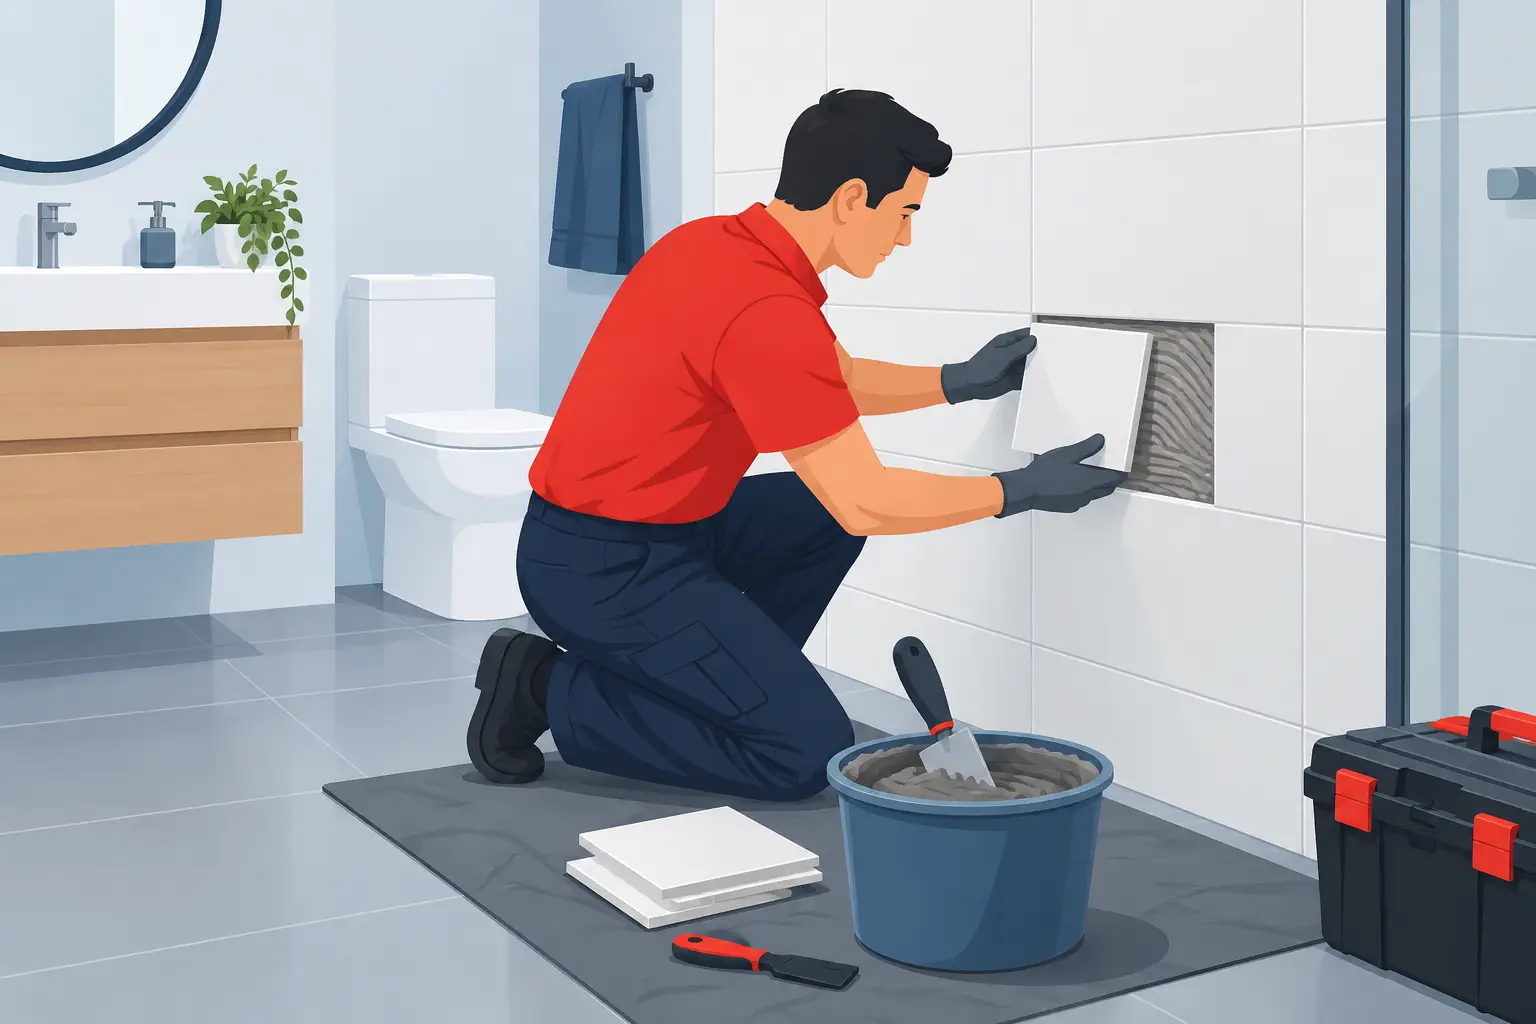
When the tile is uncracked and the surface behind it is solid and dry, it can often be reset. Plan to work slowly. Trying to pry out a tile too aggressively can crack neighboring pieces or damage the wall.
Remove the old grout first
Use a grout saw or oscillating tool with a grout-removal blade to remove grout from all four edges of the loose tile. Keep the tool within the grout joint so you do not chip adjacent tile. For wall tile, score the caulked joint instead if the tile meets a tub, shower pan, countertop, or another change of plane.
Once the joint is clear, use a stiff putty knife or thin pry tool to ease the tile away from the surface. Start where the tile has already separated. If it resists, do not keep levering against the neighboring tiles. The bond may be stronger than it appears, and breaking one tile can turn a simple reset into a matching-tile search.
Clean the tile and the surface behind it
Remove old thinset, mastic, grout residue, and loose material from the back of the tile. Then clean the wall or floor surface until it is flat, firm, and free of dust. This step matters as much as the adhesive itself. New mortar will not reliably bond to loose, chalky, wet, or uneven material.
For a floor repair, check the exposed area carefully for cracks or movement. For a wall repair in a wet area, inspect the backing for water damage. Solid cement board or a sound wall surface can usually be prepared for reset. Soft, swollen, or deteriorated material should be repaired before tile goes back on.
Reset the tile with the right adhesive
Use a tile-setting mortar appropriate for the location and tile type. Premixed adhesives may be acceptable for some dry wall applications, but shower walls and floors generally call for a product rated for wet areas. Follow the manufacturer’s directions for mixing, application thickness, and curing time.
Spread adhesive evenly on the surface, then press the tile into place with a slight back-and-forth motion. Tile spacers help maintain even grout joints. Check that the tile sits flush with its neighbors by placing a straightedge across the surrounding tiles. If it sits proud or recessed, remove it and adjust the mortar before it begins to set.
Allow the adhesive to cure fully. Rushing this step can break the new bond before it has a chance to hold.
Regrout and recaulk correctly
Once the tile is secure, fill the grout joints around it with a grout that matches the existing installation. Wipe excess grout from the tile face before it hardens. After grout has cured, use bathroom-rated silicone caulk at changes of plane, such as where a shower wall meets a tub or where two tiled walls meet.
Grout and caulk do different jobs. Grout fills the joints between tiles, while flexible caulk handles small movement where surfaces meet. Using grout in a corner or along a tub edge often leads to another crack.
When a Loose Tile Is Not a Simple Reset
A tile repair becomes more involved when the failure is widespread or moisture has damaged the structure behind the tile. In those cases, the visible tile is only the first layer of the problem.
Watch for these warning signs:
- Multiple loose or hollow-sounding tiles in the same wall or floor area
- Cracked tiles combined with recurring grout failure
- Soft, swollen, stained, or crumbling drywall or subfloor
- Water appearing outside the shower or around the toilet
- Persistent mildew odor despite regular cleaning
In a shower, failed waterproofing can allow water to collect behind the tile assembly even when the tile surface looks mostly normal. Simply adding new grout will not restore a damaged waterproof barrier. On a floor, loose tile caused by subfloor movement needs the floor stabilized before new tile can last.
This is where professional repair provides real value. A licensed and insured local repair team can determine whether a targeted tile repair is appropriate or whether the wall, shower base, backing, or flooring needs attention first. Addressing the cause protects the repair and helps avoid repeated disruption in the same bathroom.
Common Mistakes That Shorten the Life of a Tile Repair
The most common mistake is applying new grout over a loose tile. Grout is not an adhesive, so it may make the tile appear stable briefly while movement continues underneath. Another frequent issue is resetting tile onto old adhesive ridges or damp backing. The surface needs to be clean, flat, and sound for a dependable bond.
Homeowners also sometimes use the wrong material in wet locations. A shower wall is not the place for a general-purpose patch or a product that is not rated for regular moisture exposure. Finally, using rigid grout where flexible caulk belongs can create cracks at tub edges and wall corners.
If you are not sure what is behind a loose tile, a careful inspection is a better first move than a quick cosmetic fix. Bathroom moisture has a way of traveling beyond the spot where it first becomes visible.
Protecting Your Bathroom After the Repair
After a successful repair, keep the area dry during the full cure period. Once it is back in service, inspect shower caulk and grout periodically, especially near corners, fixtures, and the tub edge. Replace cracked or separated caulk promptly, and use the bathroom exhaust fan during showers and for a while afterward to reduce lingering humidity.
For Knoxville homeowners, Smart Home Fix provides practical bathroom repairs with the care of a trusted local team. A loose tile may be a straightforward reset, or it may be your bathroom’s early warning sign. Treating it promptly gives you the best chance to keep the repair small and your home protected.