That thin line of caulk around your tub or shower does more work than most homeowners realize. When it starts cracking, peeling, or turning dark with mildew, water can slip behind the surface and create bigger problems than a bathroom that looks worn out. If you are wondering how to replace bathroom caulk, the good news is that this is a manageable project when you take your time and use the right materials.
Replacing caulk is less about speed and more about prep. A rushed job usually fails early, which is why some fresh caulk starts separating after only a few months. A clean surface, the right type of caulk, and enough drying time make the difference between a patch and a repair that lasts.
How to replace bathroom caulk without shortcuts
The first step is figuring out whether the old caulk truly needs replacement or just a deep cleaning. If the bead is intact and only has surface mildew, cleaning may be enough. But if it is brittle, missing in sections, lifting from the tile, or feels soft underneath, replacement is the better move.
For most bathrooms, you will want a caulk designed specifically for kitchens and baths. Look for a product labeled waterproof and mold resistant. In wet areas like tubs, showers, and sink backsplashes, this matters. Standard painter’s caulk is easier to smooth, but it is not built for constant moisture.
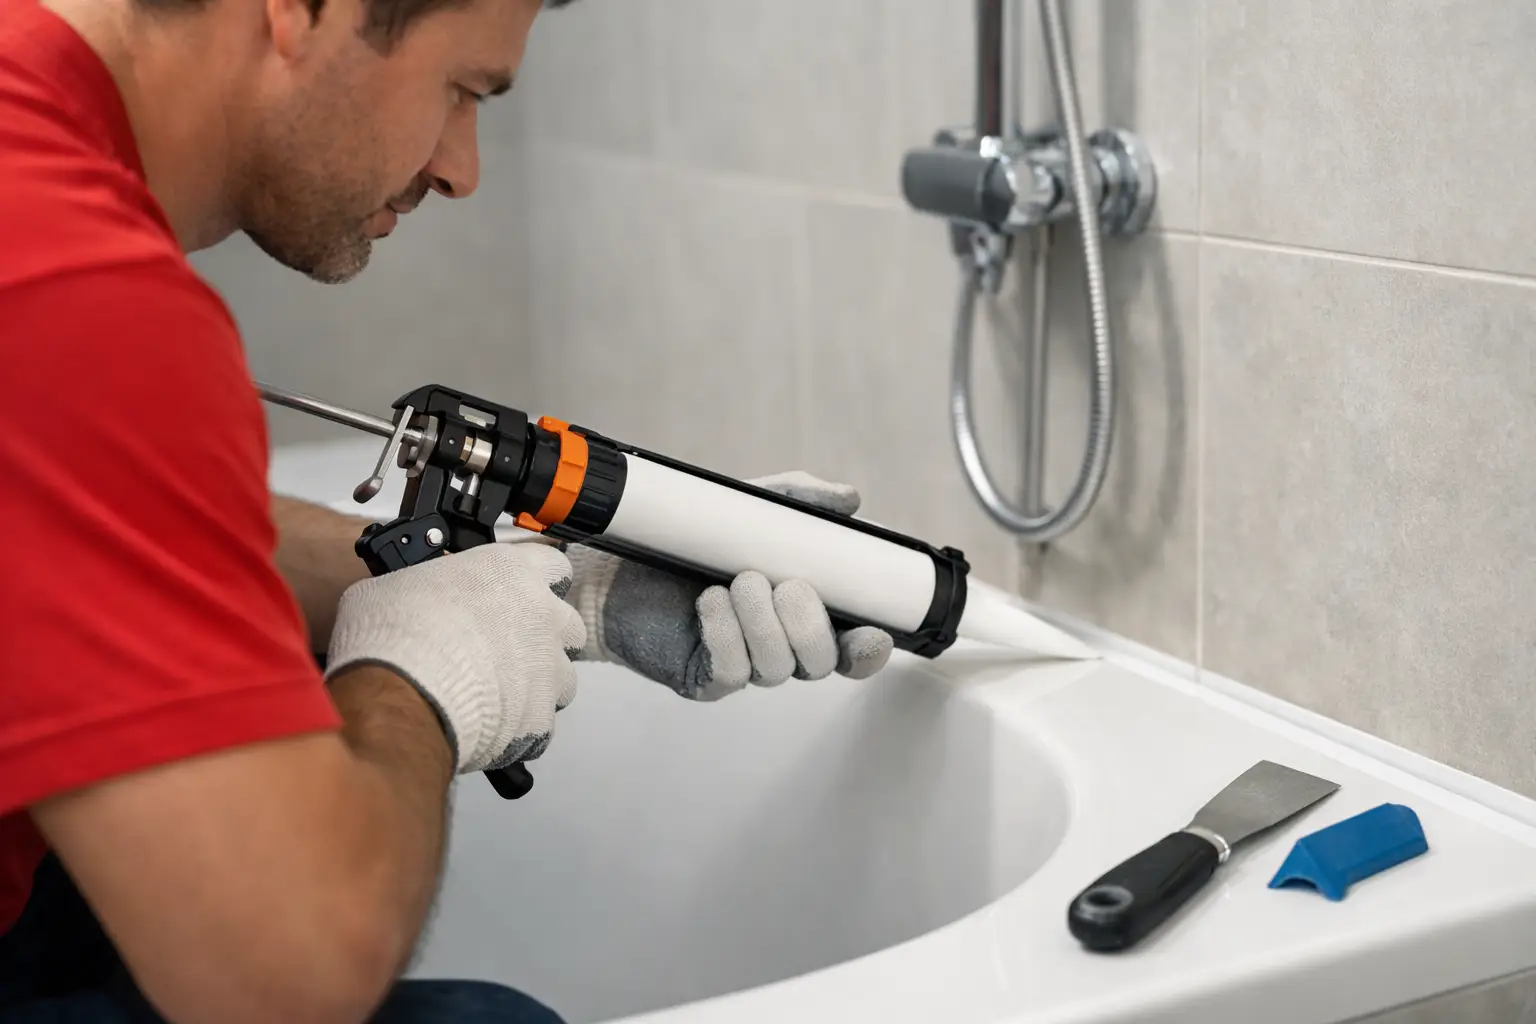
Before you begin, gather what you need: a caulk removal tool or utility knife, a putty knife, rubbing alcohol or a bathroom-safe cleaner, rags, painter’s tape, a caulk gun if the tube requires one, and your new bathroom caulk. Some people also like having paper towels and a small trash bag close by because old caulk tends to come off in messy strips.
Remove the old caulk completely
This is the part most people underestimate. New caulk does not bond well over old, loose, or contaminated material. Even a small ridge left behind can create weak spots or make the finished line look uneven.
Start by cutting along the top and bottom edges of the old bead. Work carefully, especially around fiberglass tubs, acrylic surrounds, and finished tile, since a deep slip with a blade can leave a visible scratch. Once the bead loosens, pull it away by hand or with a removal tool.
If pieces are stubborn, do not force them with excessive pressure. It is better to make another light pass with the blade than gouge the surface. After the main bead is out, scrape away any remaining residue so the joint is as clean and flat as possible.
This is also the time to check the area for hidden trouble. If the wallboard feels soft, the grout is loose, or the trim around the tub edge shows water damage, new caulk alone may not solve the issue. Caulk seals movement joints and seams, but it cannot repair damage behind the surface.
Clean and dry the joint before applying new caulk
Once the old material is gone, clean the joint thoroughly. Soap film, mildew, dust, and leftover adhesive can all interfere with adhesion. A bathroom-safe cleaner works well, and many pros like a final wipe with rubbing alcohol to remove any residue.
After cleaning, let the area dry completely. This step is easy to rush, especially in a busy household, but moisture trapped in the joint is one of the main reasons caulk fails early. If needed, leave the bathroom fan running or allow the area to sit overnight.
If you are working around a bathtub, there is one extra detail worth knowing. Some homeowners prefer to fill the tub with water before caulking where the tub meets the wall. That added weight can slightly lower the tub to its typical in-use position, helping the cured caulk handle movement better. It is not always necessary in every setup, but it can help in tubs with noticeable flex.
Apply the new caulk with control
A neat result starts with a small opening at the tip of the tube. Cut the nozzle at an angle, but do not cut more than you need. A smaller opening gives you more control and usually creates a cleaner bead.
If you want especially crisp lines, apply painter’s tape just above and below the joint. Leave only the width of the bead exposed. This takes a little more time up front, but it can make the final result look much more professional.
When you are ready, hold the caulk gun at a steady angle and move at a consistent pace. Try to lay one continuous bead instead of stopping and starting every few inches. The goal is not to pile on as much caulk as possible. More is not better here. A smooth, even bead that fully bridges the joint is what you want.
Smoothing the bead
After the bead is applied, smooth it right away before it starts to skin over. A wet finger, a caulk finishing tool, or a lightly dampened applicator can all work. Use gentle pressure and one continuous motion when possible.
If caulk bunches up or drags, you may be using too much pressure or waiting too long. Wipe your finger or tool clean between passes. If you used painter’s tape, pull it off while the caulk is still fresh for the sharpest edge.
This stage takes a little patience. It is normal for first-time DIYers to need a second attempt in one or two sections. If a spot looks messy, remove it and redo it while it is still uncured rather than hoping it will dry smooth.
Let it cure before using the bathroom
One of the biggest mistakes homeowners make after learning how to replace bathroom caulk is using the shower too soon. Dry to the touch does not mean fully cured. Most bathroom caulks need a full curing period before they can handle regular water exposure.
Always check the product instructions, since cure times vary. Some formulas are ready faster than others, but giving the caulk enough time is worth it. A rushed return to service can weaken the seal before it has a chance to set properly.
If this is the main bathroom in your home, plan the job around when you can leave it unused. That single choice often matters more than any tool you buy.
Common problems and why caulk fails early
If bathroom caulk keeps cracking or pulling away, the issue is not always the caulk itself. Sometimes the surface was not fully cleaned. Sometimes moisture was still present. In other cases, the wrong product was used in a high-moisture area.
Movement can also be a factor. Tubs and shower pans can flex slightly during use, and homes settle over time. That is why the joint between two different surfaces needs a flexible sealant rather than grout. If you have a wide gap, irregular spacing, or recurring separation in the same area, the fix may need a more careful approach than a basic re-caulk.
Bathrooms with poor ventilation also tend to wear out caulk faster. Even mold-resistant products last longer when the room dries out properly between uses. Running the exhaust fan and keeping standing water from collecting along seams will help the new bead hold up.
When to handle it yourself and when to call a pro
For a straightforward tub edge or sink backsplash, many homeowners can replace caulk successfully on their own. The job is simple, but simple does not always mean easy. Tight corners, older surfaces, damaged joints, and showers with existing water issues can make the work more complicated.
If you remove old caulk and find soft materials, loose tile, recurring mildew behind the bead, or signs that water has already moved into the wall, it is smart to stop and address the bigger issue first. A fresh line of caulk can make a bathroom look better, but it should also be part of a sound, watertight repair.
For homeowners in the Knoxville area who would rather skip the trial and error, Smart Home Fix helps with the kind of bathroom maintenance that keeps small issues from turning into larger repairs. Sometimes the smarter move is having a trusted local expert handle the prep, sealing, and inspection at the same time.
A clean bead of caulk is a small detail, but it protects some of the hardest-working surfaces in your home. Done right, it keeps water where it belongs and gives your bathroom a finished, well-maintained look that lasts.